
How to Extend OpenWRT System Storage with an USB Device
TP-Link Archer C7 AC1750
Welcome
The OpenWrt Project is a Linux operating system targeting embedded devices. Instead of trying to create a single, static firmware, OpenWrt provides a fully writable filesystem with package management. This frees you from the application selection and configuration provided by the vendor and allows you to customize the device through the use of packages to suit any application. For developers, OpenWrt is the framework to build an application without having to build a complete firmware around it; for users this means the ability for full customization, to use the device in ways never envisioned.
See the Table of Hardware for supported devices. For more information about OpenWrt project organization, see the About OpenWrt pages.
The TP-Link Archer C7 AC1750 is a wireless router with both 2.4 GHz and 5 GHz radios. It has five 1 gigabit/second Ethernet ports, and a moderately fast processor. Available since 201x. It is very affordable.
Hardware versions v1, v2 and v3 use 3 external antennas for 5 GHz and 3 internal antennas for 2.4 GHz. Versions v4 and v5 use only 3 external dual-band antennas, for 2.4 GHz and 5 GHz. In these more recent versions, the 5 GHz chipset is integrated with the mainboard, and is the router I will be using, but this process will work for all.
OpenWrt installation differs depending on the router used. Please see OpenWrt Table of hardware for specific installation instructions for your device.
Instructions for the TP-Link Archer C7 AC1750 can be found here.
This guide assumes you already have OpenWrt installed on your router, so we can begin.
To extend our router storage space, we first need to install some packages. To accomplish this we can use opkg, the LEDE native and lightweight package manager, therefore the first thing we need to do is to connect to the system via ssh. See my links page for ssh clients information. For the sake of this article I will assume the IP of the router to be 192.168.0.1. We will login as the root user:
$ ssh root@192.168.0.1
root@192.168.0.1's password:
After we enter the root user password, we should be see following message:
(the same we use to login into the router web interface)
Once logged in, we need to update the list of the available packages:
# opkg update
Once the list is updated we can install the packages we need:
# opkg install nano block-mount kmod-fs-ext4 kmod-usb-storage e2fsprogs kmod-usb-ohci kmod-usb-uhci fdisk
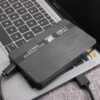
We can setup our USB device we intend to use either on a separate machine, or directly on the LEDE system, using fdisk. For this tutorial we will choose the second option and create a single partition which will use all the space available on the USB device.
First we connect the USB to our device. To verify it is recognized by the kernel we can examine the last lines of the output produced by the dmesg command. We should observe a result similar to the following:
# dmesg | tail
[   91.701565] usb-storage 1-1.1:1.0: USB Mass Storage device detected
[   91.708962] scsi host2: usb-storage 1-1.1:1.0
[   92.714770] scsi 2:0:0:0: Direct-Access     Kingston DataTraveler 2.0 1.00 PQ: 0 ANSI: 2
[   92.726372] sd 2:0:0:0: [sda] 1994752 512-byte logical blocks: (1.02 GB/974 MiB)
[   92.734814] sd 2:0:0:0: [sda] Write Protect is off
[   92.739691] sd 2:0:0:0: [sda] Mode Sense: 23 00 00 00
[   92.745685] sd 2:0:0:0: [sda] No Caching mode page found
[   92.751147] sd 2:0:0:0: [sda] Assuming drive cache: write through
[   92.851061]  sda: sda1
[   92.858827] sd 2:0:0:0: [sda] Attached SCSI removable disk
Our device has been recognizes as sda. To partition it, we launch fdisk and pass the USB device path as the utility argument:
# fdisk /dev/sda
Welcome to fdisk (util-linux 2.29.2).
Changes will remain in memory only, until you decide to write them.
Be careful before using the write command.
Command (m for help):
The first thing we want to do is to create a new DOS partition table on the device, we enter o as command, and press enter:
Command (m for help): o
Created a new DOS disklabel with disk identifier 0xd67f57f9.
Next, we want to add a new partition. We use the n command to perform the operation. We will be asked want type of partition we want to create: here we want a primary partition. We will also asked to enter the partition number and the partition first and the last sector. In all three cases we can just press enter and accept the defaults.
Command (m for help): n
Partition type
   p   primary (0 primary, 0 extended, 4 free)
   e   extended (container for logical partitions)
Select (default p):

Using default response p.
Partition number (1-4, default 1):
First sector (2048-1994751, default 2048):
Last sector, +sectors or +size{K,M,G,T,P} (2048-1994751, default 1994751):

Created a new partition 1 of type 'Linux' and of size 973 MiB.
The changes we performed to the device are not effective yet. To confirm them we must use the w command:
Command (m for help): w
The partition table has been altered.
Calling ioctl() to re-read partition table.
Syncing disks.
Now that our device is partitioned, we must create a filesystem. The next step we create an ext4 filesystem on the partition we created in the previous step. We just have to launch the mkfs.ext4 command and pass the path of the partition as argument:
# mkfs.ext4 /dev/sda1
mke2fs 1.43.3 (04-Sep-2016)
Creating filesystem with 249088 4k blocks and 62336 inodes
Filesystem UUID: 42109b6a-759a-48ba-a7b9-1508d0973131
Superblock backups stored on blocks:
    32768, 98304, 163840, 229376

Allocating group tables: done
Writing inode tables: done
Creating journal (4096 blocks): done
Writing superblocks and filesystem accounting information: done
We take note of the filesystem UUID (42109b6a-759a-48ba-a7b9-1508d0973131): we need it to reference the fileystem in the next step.
In this step we modify the system fstab file, which in our LEDE system is /etc/config/fstab. To do this we can use Nano a small and simple text editor for use on the terminal, which we installed earlier.
# nano /etc/config/fstab
Inside the file, we append the following section:
config 'mount'
        option  target  '/overlay'
        option  uuid    '42109b6a-759a-48ba-a7b9-1508d0973131'
        option  enabled '1'
The filesystem identified by UUID, which is the one we created on our USB device, will be mounted on /overlay, so it will be used as the system storage.
In order for our setup to work we must copy the content of the current system storage onto the USB device. We first mount the ext4 filesystem on /mnt:
# mount /dev/sda1 /mnt
Then, we copy the content onto it:
# cp -a /overlay/. /mnt
In the example above, we used the cp command with two options -a option: it is the short version of –archive, and it is used to preserve the attribute of the copied files.
At this point our setup should be complete. For the changes to become effective we need to reboot the system. We can turn the device off and on again from the physical switch, or we can issue the following command (the terminal will probably freeze once the device is turned off):
# reboot
Once the system is rebooted, to verify the additional space is used, we can login again to our router, and run the df command passing /overlay as argument. Here we also used the -h option in order to obtain human-readable sizes:
# df -h /overlay
Filesystem                Size      Used Available Use% Mounted on
/dev/sda1               941.7M      5.2M    871.9M   1% /overlay
As expected, we can see that /dev/sda1 is the filesystem mounted on /overlay: the size is 941.7M: only 5.2M are in use, which is approximately the 1% of the available space.
Back to stock
Returning to the stock system configuration is pretty simple, only few steps must be performed. The first thing we have to do is to identify the system partition originally mounted on /overlay. To do so, we must take a look at the /proc/mtd file:
# cat /proc/mtd
dev:    size   erasesize  name
mtd0: 00020000 00010000 "u-boot"
mtd1: 001333cc 00010000 "kernel"
mtd2: 0069cc34 00010000 "rootfs"
mtd3: 00460000 00010000 "rootfs_data"
mtd4: 00010000 00010000 "art"
mtd5: 007d0000 00010000 "firmware"
What interests us is the mtd file with the rootfs_data name, which in this case is mtd3. We must mount the corresponding block device, /dev/mtdblock3 on /mnt:
# mount -t jffs2 /dev/mtdblock3 /mnt
Notice that we used the -t option of the mount command to specify the filesystem type, jffs2 in this case (a filesystem designed specifically for flash memory devices).
Once the partition is mounted, we must revert the changes previously made in the fstab file. At this point the original file should be accessible as /mnt/upper/etc/config/fstab. We open it with our favorite text editor and either delete, comment or modify the section we previously added, from:
config 'mount'
        [...]
        option  enabled '1'
To:
config 'mount'
        [...]
        option  enabled '0'
Once we are done, we save the changes. Finally, we unmount the block device and reboot the system:
# umount /mnt && reboot
In this article we learned how to expand the storage space of a LEDE system using a simple USB device. LEDE is an open source OS which can be installed on a variety of routers; with this simple procedure we obtain more space for the system data and use it, for example, to install additional packages which would not fit on the usually small storage space available on routers. To know more about the LEDE project, please visit the LEDE documentation.


“Simply extraordinary! ✨ Your in-depth analysis and crystal-clear explanations make this a must-read. The amount of valuable information you’ve packed in here is amazing.”
Wow superb blog layout How long have you been blogging for you make blogging look easy The overall look of your site is magnificent as well as the content